Installing Oval LED Lights in Your Headache Rack
Choosing the Brake/Turn LED add-on option for your headache rack is a great way to increase safety and add visibility to your truck, particularly if you're towing fifth wheel or gooseneck trailers.
Wiring these lamps (or any other of our lighting options) isn't particularly difficult but there are a couple of tricks that will make the job that much easier. This article won't cover the ins and outs of actually making the wire connections. For that, you'll want to check out our article, "How do I Wire my Add-On Lights?" Instead, we'll show you how to remove and install the oval shaped brake/turn LED lamps, whether you've got a double, quad, or triple (6) lamp setup.
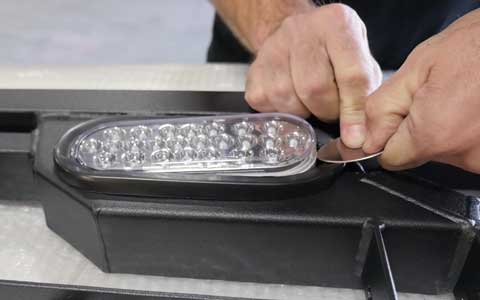
The brake/turn LED lamps come pre-installed in our headache rack and they'll need to be removed to make the wiring connections. Rather than trying to pull the entire assembly out of the rack at once, you should first pop the LED light out of the rubber grommet - which is easier said than done.
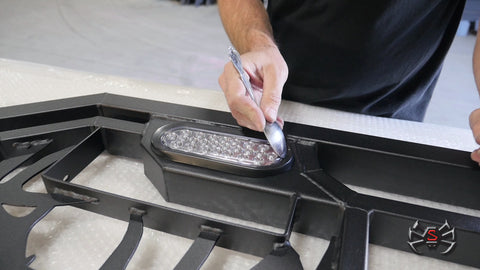
A rounded tool, such as a spoon from your kitchen, is as high tech as you need to get. Slip the spoon in between the end of the lamp and the grommet and gently pry it out. If the spoon is inserted far enough it will catch the seam on the lamp and lift out without much trouble. The grommet will easily come out now too.
Each lamp has a pigtail with color coded wires and the connections are marked on the housing. Inside the light "boxes" on the rack you'll find holes for chasing wires through the outer tube of the rack. If you ordered other auxiliary lights you'll find a hole to bring wires into the box as well. Once the connections are make (quick disconnects or properly crimped/soldered connections recommended) you can chase the wires through the provided holes for a clean looking installation on our truck.
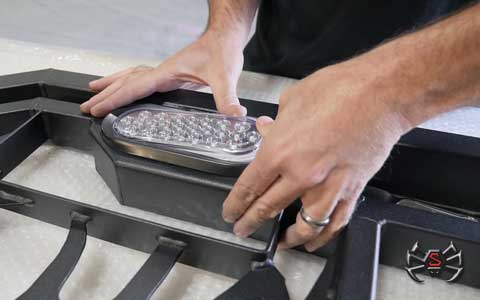
To re-install the lamps on the rack, start with the rubber grommet. It's soft and pliable so just press it into place. Making sure the wires are inside the box and won't get pinched, insert an end of the LED lamp into the end of the grommet at an angle to get it started and then gently press the remainder in place. The lamp will lock everything together and prevent it from falling out.
And, that's it! With your wiring exiting the provided hole on either leg of the rack you're ready to complete your electrical connections. If you're not comfortable doing the wiring yourself then we suggest talking with your favorite mechanic or even the service department at a local RV/Trailer dealer.
Here's a video that demonstrates the tips shared in this article: